Parse.com PHP Facebook Login with JavaScript

There is little documentation out there showing how to successfully create a new Parse user using PHP – Facebook login method. Here is the steps that worked for me:

  • Add  Facebook PHP-SDK in your web app
  • Add Facebook SDK for JavaScript. Include the Facebook login button.
  • Initialize a Facebook session. (Facebook App ID and App Secret). In your php code it should look like this:

$fb = new Facebook([
'app_id' =>'YOUr APP ID',
'app_secret' =>'YOUR APP SECRET',
'default_graph_version' => 'v2.5',
]);

  • Authenticate user with Facebook (clicking the javascript login button). Follow the facebook Javascript login button guide here:

Once the users authenticates via the login button. We will use the php javascript helper to retrieve the values to php.


$helper = $fb->getJavaScriptHelper();
 $oAuth2Client = $fb->getOAuth2Client();
 try {
 $accessToken = $helper->getAccessToken(); //getting short lived token
 $token = $accessToken;

 } catch(Facebook\Exceptions\FacebookResponseException $e) {
 // When Graph returns an error
 echo 'Graph returned an error: ' . $e->getMessage();
 
 } catch(Facebook\Exceptions\FacebookSDKException $e) {
 // When validation fails or other local issues
 echo 'Facebook SDK returned an error: ' . $e->getMessage();
 
 }

  • Get the user’s Facebook ID.

Once we have the token. We can get the long lived token and use that to retrieve the users Facebook values:


<strong></strong>

$longLivedAccessToken = $oAuth2Client->getLongLivedAccessToken($token);
$longToken = $longLivedAccessToken->getValue();

$fb->setDefaultAccessToken($longLivedAccessToken);
 
 $response = $fb->get('/me?fields=id, email'); //retrieving users id and email

$user = $response->getGraphUser();
 $id = $user['id'];
 $email = $user['email'];

  • Authenticate the user with Parse with ID and access code.

ParseUser::logInWithFacebook($id, $longToken);


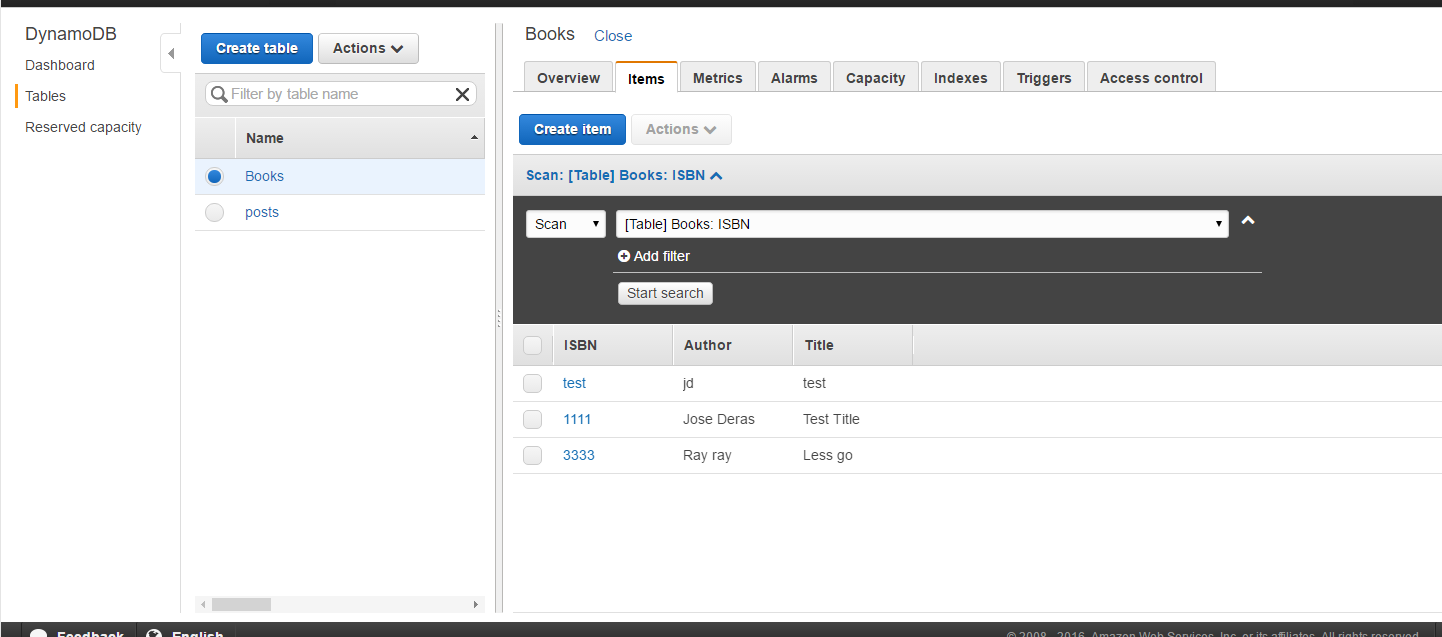
Here is the full php and js code. You’ll have to refresh the page a few times to show the user is created and logged in.


<?php 
use Facebook\Facebook as Facebook;
use Parse\ParseUser;
use Parse\ParseClient;
?>
<!DOCTYPE html>
<html>
    <head>
        <title>TEST PHP</title>

        <link href="https://fonts.googleapis.com/css?family=Lato:100" rel="stylesheet" type="text/css">

        <style>
            html, body {
                height: 100%;
            }

            body {
                margin: 0;
                padding: 0;
                width: 100%;
                display: table;
                font-weight: 100;
                font-family: 'Lato';
            }

            .container {
                text-align: center;
                display: table-cell;
                vertical-align: middle;
            }

            .content {
                text-align: center;
                display: inline-block;
            }

            .title {
                font-size: 96px;
            }
        </style>
    </head>
    <body>
	
	<div id="fb-root"></div>
<div id="fb-root"></div>
<script>


function statusChangeCallback(response) {
    console.log('statusChangeCallback');
    console.log(response);
    // The response object is returned with a status field that lets the
    // app know the current login status of the person.
    // Full docs on the response object can be found in the documentation
    // for FB.getLoginStatus().
    if (response.status === 'connected') {
      // Logged into your app and Facebook.
      testAPI();
    } else if (response.status === 'not_authorized') {
      // The person is logged into Facebook, but not your app.
      document.getElementById('status').innerHTML = 'Please log ' +
        'into this app.';
    } else {
      // The person is not logged into Facebook, so we're not sure if
      // they are logged into this app or not.
      document.getElementById('status').innerHTML = 'Please log ' +
        'into Facebook.';
    }
  }

  // This function is called when someone finishes with the Login
  // Button.  See the onlogin handler attached to it in the sample
  // code below.
  function checkLoginState() {
    FB.getLoginStatus(function(response) {
      statusChangeCallback(response);
    });
  }

  window.fbAsyncInit = function() {
  FB.init({
    appId      : 'YOUR APP ID',
    cookie     : true,  // enable cookies to allow the server to access 
                        // the session
    xfbml      : true,  // parse social plugins on this page
    version    : 'v2.5' // use graph api version 2.5
  });

  // Now that we've initialized the JavaScript SDK, we call 
  // FB.getLoginStatus().  This function gets the state of the
  // person visiting this page and can return one of three states to
  // the callback you provide.  They can be:
  //
  // 1. Logged into your app ('connected')
  // 2. Logged into Facebook, but not your app ('not_authorized')
  // 3. Not logged into Facebook and can't tell if they are logged into
  //    your app or not.
  //
  // These three cases are handled in the callback function.

  FB.getLoginStatus(function(response) {
    statusChangeCallback(response);
  });

  };


	(function(d, s, id) {
	  var js, fjs = d.getElementsByTagName(s)[0];
	  if (d.getElementById(id)) return;
	  js = d.createElement(s); js.id = id;
	  js.src = "//connect.facebook.net/en_US/sdk.js#xfbml=1&version=v2.6&appId=YOURAPPID";
	  fjs.parentNode.insertBefore(js, fjs);
	}
(document, 'script', 'facebook-jssdk'));


</script>
	
	
        <div class="container">
            <div class="content">
                <div class="title">TESTING</div>
				<?php 
				
				//testing login
								$fb = new Facebook([
			  'app_id' => 'YOUR APP ID',
			  'app_secret' => 'YOUR APP SECRET',
			  'default_graph_version' => 'v2.5',
			]);
			
			//first check parse
			$currentUser = ParseUser::getCurrentUser();
			
			if($currentUser){
				echo 'user is logged in, logging out';
				//ParseUser::logOut();
			}
			else{


				$helper = $fb->getJavaScriptHelper();
				$oAuth2Client = $fb->getOAuth2Client();
				try {
				  $accessToken = $helper->getAccessToken(); //getting short lived token
				  $token = $accessToken;


				} catch(Facebook\Exceptions\FacebookResponseException $e) {
				  // When Graph returns an error
				  echo 'Graph returned an error: ' . $e->getMessage();
			
				} catch(Facebook\Exceptions\FacebookSDKException $e) {
				  // When validation fails or other local issues
				  echo 'Facebook SDK returned an error: ' . $e->getMessage();
			
				}
		
				if (! isset($accessToken)) {
  echo 'No cookie set or no OAuth data could be obtained from cookie.';

}else{

// Logged in
echo '<h3>Access Token</h3>';


$longLivedAccessToken = $oAuth2Client->getLongLivedAccessToken($token);
$longToken = $longLivedAccessToken->getValue();  

				$fb->setDefaultAccessToken($longLivedAccessToken);
				
				$response = $fb->get('/me?fields=id, email');

				   $user = $response->getGraphUser();
				   $id = $user['id'];
				   $email = $user['email'];
				   
				   ParseUser::logInWithFacebook($id, $longToken); //works


}
			}
				?>
				<fb:login-button scope="public_profile,email" onlogin="checkLoginState();"></fb:login-button>
				<div id="status"> <?php //dispayis please login to facebook message if not logged in ?>
            </div>
        </div>
    </body>
</html>


Cannot upload guest agent’s files to the administrative share – Veeam

Veeam Error when processing a backup job.

Failed to prepare guest for hot backup. Processing HOSTNAME Error: Cannot upload guest agent’s files to the administrative share [\\x.x.x.x\ADMIN$]. Cannot create folder [\\x.x.x.x\ADMIN$\VeeamVssSupport]. CreateDirectoryW(\\?\UNC\x.x.x.x\ADMIN$\VeeamVssSupport) failed. Win32 error:Access is denied. Code: 5

I came across the following error after I configured McAfee EPO access protection policies:

This needs to be disabled in your epo: Anti-virus Standard Protection:Prevent remote creation/modification of executable and configuration files

epo-ap


Also you need to give vmtools access to run on your temp folders explicitly.

Anti-spyware Maximum Protection:Prevent all programs from running files from the Temp folder

epo-maxepo-max-details

Use Case Netgear ReadyNAS with SSD and VMware SQL Performance

In my test environment I wanted to see the performance difference when using a Netgear RN422X122 ReadyNas with Sata Drives vs SSD. Here is the NAS.

The NAS was setup using Raid5 as an isci target to my esxi hosts. The SATA drives were Toshiba SATA HDD Enterprise 3.5″ MG03ACAx00 drives. I loaded my test servers which included several app servers and an intensive MS SQL server to simulate a real work environment.

Here was the latest performance for the disk:

disk_latency_sata Netgear ReadyNAS

Notice the highest latency… ouch. Obviously the storage unit and disks weren’t designed to handle this type of load.

Now with SSD we should noticed a huge jump in performance. The drives I used were Intel Solid-State Drive DC S3510 Series.

Using the same configuration and VMs the result were quite different as you would expect.

disk_latency_ssd Netgear ReadyNAS

The sql queries also ran much quicker. The Netgear ReadyNas has held its ground and its a very good option with SSD versus the bigger players. If you are in a tight budget I would definitely consider it.

AWS S3 Swift – Upload Image from camera or photolibrary

Using the s3transferutility we will upload images from your camera or photo library in swift. View the source on github

In this example We will have 2 buttons – Camera Upload and Picture Upload.

Depending on what is selected as the data source (camera or photo library) it will upload the file accordingly. If you use the camera button you will notice that we will have to create a temp directory when uploading the image, since there is no asset location for it on the device.

You can find more info in the aws sdk

//
//  PictureViewController.swift
// 
//
//  Created by Jose Deras on 12/30/15.
//  Copyright © 2015 Jose Deras. All rights reserved.
//

import UIKit
import AWSMobileAnalytics
import AWSCognito
import AWSS3
import AWSCore
import Photos
import MobileCoreServices


class PictureViewController: UIViewController, UIImagePickerControllerDelegate, UINavigationControllerDelegate {
    
    @IBOutlet weak var progressView: UIProgressView!
    

    @IBOutlet weak var imageView: UIImageView!
    
    @IBAction func openCameraButton(sender: AnyObject) {
        if UIImagePickerController.isSourceTypeAvailable(UIImagePickerControllerSourceType.Camera) {
            let camImagePicker = UIImagePickerController()
            camImagePicker.delegate = self
            camImagePicker.sourceType = UIImagePickerControllerSourceType.Camera;
            camImagePicker.allowsEditing = false
            self.presentViewController(camImagePicker, animated: true, completion: nil)
        }
    }
    
    
    @IBAction func openPhotoLibrary(sender: AnyObject) {
        if UIImagePickerController.isSourceTypeAvailable(UIImagePickerControllerSourceType.PhotoLibrary) {
            let imagePicker = UIImagePickerController()
            imagePicker.delegate = self
            imagePicker.sourceType = UIImagePickerControllerSourceType.PhotoLibrary;
            imagePicker.allowsEditing = true
            self.presentViewController(imagePicker, animated: true, completion: nil)
        }
    }


    //handles upload
    var uploadCompletionHandler: AWSS3TransferUtilityUploadCompletionHandlerBlock?
    
    var uploadFileURL: NSURL?
    

    override func viewDidLoad() {
        super.viewDidLoad()


        //setting progress bar to 0
        self.progressView.progress = 0.0;


    }

    override func didReceiveMemoryWarning() {
        super.didReceiveMemoryWarning()
        // Dispose of any resources that can be recreated.
    }


    //begin upload from photo library

    func imagePickerController(picker: UIImagePickerController, didFinishPickingMediaWithInfo info: [String : AnyObject]) {
      
        //first run if its coming from photo album
        if(picker.sourceType == UIImagePickerControllerSourceType.PhotoLibrary)
        {
            
        //getting details of image
        let uploadFileURL = info[UIImagePickerControllerReferenceURL] as! NSURL
        
        let imageName = uploadFileURL.lastPathComponent
        let documentDirectory = NSSearchPathForDirectoriesInDomains(.DocumentDirectory, .UserDomainMask, true).first! as String
        
       // getting local path
        let localPath = (documentDirectory as NSString).stringByAppendingPathComponent(imageName!)

        
        //getting actual image
        let image = info[UIImagePickerControllerOriginalImage] as! UIImage
        let data = UIImagePNGRepresentation(image)
        data!.writeToFile(localPath, atomically: true)
        
        let imageData = NSData(contentsOfFile: localPath)!
        let photoURL = NSURL(fileURLWithPath: localPath)
       
        // let imageWithData = UIImage(data: imageData)!
        
        
        //defining bucket and upload file name
        let S3BucketName: String = "bucketNAme"
        let S3UploadKeyName: String = "test_libarayUpload.jpg"


        let expression = AWSS3TransferUtilityUploadExpression()
        expression.uploadProgress = {(task: AWSS3TransferUtilityTask, bytesSent: Int64, totalBytesSent: Int64, totalBytesExpectedToSend: Int64) in
            dispatch_async(dispatch_get_main_queue(), {
                let progress = Float(totalBytesSent) / Float(totalBytesExpectedToSend)
                self.progressView.progress = progress
                // self.statusLabel.text = "Uploading..."
                NSLog("Progress is: %f",progress)
            })
        }
        
        self.uploadCompletionHandler = { (task, error) -> Void in
            dispatch_async(dispatch_get_main_queue(), {
                if ((error) != nil){
                    NSLog("Failed with error")
                    NSLog("Error: %@",error!);
                    //    self.statusLabel.text = "Failed"
                }
                else if(self.progressView.progress != 1.0) {
                    //    self.statusLabel.text = "Failed"
                    NSLog("Error: Failed - Likely due to invalid region / filename")
                }
                else{
                    //    self.statusLabel.text = "Success"
                    NSLog("Sucess")
                }
            })
        }
        
        let transferUtility = AWSS3TransferUtility.defaultS3TransferUtility()
        
        transferUtility?.uploadFile(photoURL, bucket: S3BucketName, key: S3UploadKeyName, contentType: "image/jpeg", expression: expression, completionHander: uploadCompletionHandler).continueWithBlock { (task) -> AnyObject! in
            if let error = task.error {
                NSLog("Error: %@",error.localizedDescription);
                //  self.statusLabel.text = "Failed"
            }
            if let exception = task.exception {
                NSLog("Exception: %@",exception.description);
                //   self.statusLabel.text = "Failed"
            }
            if let _ = task.result {
                // self.statusLabel.text = "Generating Upload File"
                NSLog("Upload Starting!")
                // Do something with uploadTask.
            }
            
            return nil;
        }
        
            //end if photo library upload
        self.dismissViewControllerAnimated(true, completion: nil);
        
        }
            
            
            //second check if its coming from camera
        else if(picker.sourceType == UIImagePickerControllerSourceType.Camera)
        {
        
          //  var imageToSave: UIImage = info(UIImagePickerControllerOriginalImage) as UIImage
            var imageToSave: UIImage = info[UIImagePickerControllerOriginalImage] as! UIImage
            
            //defining bucket and upload file name
            let S3BucketName: String = "bucketName"
            //setting temp name for upload
            let S3UploadKeyName = "Test2CameraUpload.jpg"
            
            //settings temp location for image
            let imageName = NSURL.fileURLWithPath(NSTemporaryDirectory() + S3UploadKeyName).lastPathComponent
            let documentDirectory = NSSearchPathForDirectoriesInDomains(.DocumentDirectory, .UserDomainMask, true).first! as String
            
            // getting local path
            let localPath = (documentDirectory as NSString).stringByAppendingPathComponent(imageName!)
            
            
            //getting actual image
            let image = info[UIImagePickerControllerOriginalImage] as! UIImage
            let data = UIImagePNGRepresentation(image)
            data!.writeToFile(localPath, atomically: true)
            
            let imageData = NSData(contentsOfFile: localPath)!
            let photoURL = NSURL(fileURLWithPath: localPath)


            let expression = AWSS3TransferUtilityUploadExpression()
            expression.uploadProgress = {(task: AWSS3TransferUtilityTask, bytesSent: Int64, totalBytesSent: Int64, totalBytesExpectedToSend: Int64) in
                dispatch_async(dispatch_get_main_queue(), {
                    let progress = Float(totalBytesSent) / Float(totalBytesExpectedToSend)
                    self.progressView.progress = progress
                    // self.statusLabel.text = "Uploading..."
                    NSLog("Progress is: %f",progress)
                })
            }
            
            self.uploadCompletionHandler = { (task, error) -> Void in
                dispatch_async(dispatch_get_main_queue(), {
                    if ((error) != nil){
                        NSLog("Failed with error")
                        NSLog("Error: %@",error!);
                        //    self.statusLabel.text = "Failed"
                    }
                    else if(self.progressView.progress != 1.0) {
                        //    self.statusLabel.text = "Failed"
                        NSLog("Error: Failed - Likely due to invalid region / filename")
                    }
                    else{
                        //    self.statusLabel.text = "Success"
                        NSLog("Sucess")
                    }
                })
            }
            
            let transferUtility = AWSS3TransferUtility.defaultS3TransferUtility()
            
            transferUtility?.uploadFile(photoURL, bucket: S3BucketName, key: S3UploadKeyName, contentType: "image/jpeg", expression: expression, completionHander: uploadCompletionHandler).continueWithBlock { (task) -> AnyObject! in
                if let error = task.error {
                    NSLog("Error: %@",error.localizedDescription);
                    //  self.statusLabel.text = "Failed"
                }
                if let exception = task.exception {
                    NSLog("Exception: %@",exception.description);
                    //   self.statusLabel.text = "Failed"
                }
                if let _ = task.result {
                    // self.statusLabel.text = "Generating Upload File"
                    NSLog("Upload Starting!")
                    // Do something with uploadTask.
                }
                
                return nil;
            }
            
            //end if photo library upload
            self.dismissViewControllerAnimated(true, completion: nil);


        }
       
        else{
            NSLog("Shit fucked up yo")
        }
        
        
    }
  

}

Oracle Primavera – Database Setup Error

Error:
“WARNING:This operation will destroy existing data in the database:”
Do you wish to continue? (Y or N)y
Exception in thread “Main Thread” java.lang.NoClassDefFoundError: com/primavera/
database/tools/Dataloader/RunDataloader
Caused by: java.lang.ClassNotFoundException: com.primavera.database.tools.Datalo
ader.RunDataloader
at java.net.URLClassLoader$1.run(URLClassLoader.java:202)
at java.net.URLClassLoader.findClass(URLClassLoader.java:190)
at java.lang.ClassLoader.loadClass(ClassLoader.java:305)
at sun.misc.Launcher$AppClassLoader.loadClass(Launcher.java:308)
at java.lang.ClassLoader.loadClass(ClassLoader.java:246)
Could not find the main class: com.primavera.database.tools.Dataloader.RunDatalo
ader. Program will exit.

Usually you get this error if the directory to the location of the rundataloader.bat file is not on the c drive.

So if you cannot change the directory to the correct drive for example e:\ then you will need to use powershell and try again.

Configure WPAD on Windows Server

To configure WPAD on a windows server you will need the following:

1. A proxy server – see create Ubuntu Squid Proxy
2. A web server that will host the WPAD file
3. A DHCP server that will assign the WPAD file to clients

In this post we’ll assume you have a proxy up and running. So we will need to create the WPAD.dat file first.

On your webserver (in this example we are using Windows Server 2008R2 with IIS enabled). You will need to create a WPAD.dat file.
A wpad file typically looks like this:

 function FindProxyForURL(url,host)
 {


// If URL has no dots in domain name, send direct (no proxy)
	if (isPlainHostName(host))
		return "DIRECT";

// If URL matches, send direct.
	if (shExpMatch(url,"*.somedomain.com*") ||
            shExpMatch(url,"*.google.com*"))  	    	
		return "PROXY 192.168.0.195:3128";
		
// If IP address is internal or hostname resolves to internal IP, send direct.
	var resolved_ip = dnsResolve(host);
	if (isInNet(resolved_ip, "192.168.0.0", "255.0.0.0") ||
		isInNet(resolved_ip, "127.0.0.0", "255.255.255.0"))
		return "DIRECT";
			else return "PROXY 192.168.0.195:3128";
 }

I will have the file placed on the root of my web server: C:\inetpub\wwwroot
File Name: wpad.dat
URL: http://mywebserver.domain.local:80/wpad.dat

Once that is created and you can browse the URL and the file prompts to be downloaded then you can enable it on the DHCP server.

On your DHCP Server (in this example we are using Windows Server 2008R2) you will have to create a scope option 252 (“auto-proxy-config”) with a string value of http://mywebserver.domain.local:80/wpad.dat

To do this, in DHCP, right click ipv4 and select Set Predefined options.
Select DHCP Standard options
Then select add
The name should be: 252 WPAD
Data type: String
String value: URL: http://mywebserver.domain.local:80/wpad.dat (Will be the wpad URL)
Ok and apply.

Now you can enable it within your DHCP Scope.

Expand your scope, then go to scope options.
Right click scope option and select configure options.
Scroll down and select the new 252 WPAD option you created and enable it.
Select ok.

Now you can test it on your network. Restart your computer or ipconfig/renew to retrieve the new details.

AWS S3 Swift – Download Image

In the example I will be downloading an image from my S3 bucket using S3TransferUtility for iOS in swift. You can find the source here on github

In the example i have 2 outlets:

    @IBOutlet weak var progressView: UIProgressView!
    @IBOutlet weak var imageView: UIImageView!

This function defines what s3 bucket we are using and the file/image we need to download. It then handles the progress view and finally the image view.

func downloadImage(){
        
        var completionHandler: AWSS3TransferUtilityDownloadCompletionHandlerBlock?

        //downloading image
        
        
        let S3BucketName: String = "yourBucketName"
        let S3DownloadKeyName: String = "example-image-1.png"


        let expression = AWSS3TransferUtilityDownloadExpression()
        expression.downloadProgress = {(task: AWSS3TransferUtilityTask, bytesSent: Int64, totalBytesSent: Int64, totalBytesExpectedToSend: Int64) in
            dispatch_async(dispatch_get_main_queue(), {
                let progress = Float(totalBytesSent) / Float(totalBytesExpectedToSend)
                self.progressView.progress = progress
                //   self.statusLabel.text = "Downloading..."
                NSLog("Progress is: %f",progress)
            })
        }


        self.completionHandler = { (task, location, data, error) -> Void in
            dispatch_async(dispatch_get_main_queue(), {
                if ((error) != nil){
                    NSLog("Failed with error")
                    NSLog("Error: %@",error!);
                    //   self.statusLabel.text = "Failed"
                }
                else if(self.progressView.progress != 1.0) {
                    //    self.statusLabel.text = "Failed"
                    NSLog("Error: Failed - Likely due to invalid region / filename")
                }
                else{
                    //    self.statusLabel.text = "Success"
                    self.imageView.image = UIImage(data: data!)
                }
            })
        }
        
        let transferUtility = AWSS3TransferUtility.defaultS3TransferUtility()
        
        transferUtility?.downloadToURL(nil, bucket: S3BucketName, key: S3DownloadKeyName, expression: expression, completionHander: completionHandler).continueWithBlock { (task) -> AnyObject! in
            if let error = task.error {
                NSLog("Error: %@",error.localizedDescription);
                //  self.statusLabel.text = "Failed"
            }
            if let exception = task.exception {
                NSLog("Exception: %@",exception.description);
                //  self.statusLabel.text = "Failed"
            }
            if let _ = task.result {
                //    self.statusLabel.text = "Starting Download"
                NSLog("Download Starting!")
                // Do something with uploadTask.
            }
            return nil;
        }
        
    }

AWS DynamoDB Swift – Inserting Values

To insert/save items in a DynamoDB using swift. (I will be using the example based here, translated to use swift) You can find the source files here: Github

Here is what my table looks like:

dynaboDB-table-example

You first have to define a Mapping Class. Basically this is where you define what values from the table you need to insert values to:

//class that gets the objects from db
class DDBTableRow :AWSDynamoDBObjectModel ,AWSDynamoDBModeling  {
     
    var ISBN:String?
    var Title:String?
    var Author:String?
     
 
    class func dynamoDBTableName() -> String! {
        return "Books"
    }
 
     
// if we define attribute it must be included when calling it in function testing...
    class func hashKeyAttribute() -> String! {
        return "ISBN"
    }


    class func ignoreAttributes() -> Array<AnyObject>! {
        return nil
    }
     
    //MARK: NSObjectProtocol hack
    //Fixes Does not conform to the NSObjectProtocol error
 
    override func isEqual(object: AnyObject?) -> Bool {
        return super.isEqual(object)
    }
     
    override func `self`() -> Self {
        return self
    }
}

Once you have the class implementation, then you can begin saving values. Here I created a function called insertValues. I created a few textfield outlets to allow user input and also included the static values commented out.

func insertValues(){
        
        //static values 
        //    let newBook = DDBTableRow.self()
        //    newBook.ISBN = "3333"
        //    newBook.Author = "Ray Jay"
        //    newBook.Title = "Less go"
        
        //values from a text field
        let newBook = DDBTableRow.self()      
        newBook.ISBN = self.isbnField.text
        newBook.Title = self.titleField.text
        newBook.Author = self.authorField.text
        
        
        //saving it
        
        let insertValues = AWSDynamoDBObjectMapper.defaultDynamoDBObjectMapper()
        
        insertValues.save(newBook) .continueWithBlock({ (task: AWSTask!) -> AnyObject! in
            if ((task.error) != nil) {
                NSLog("Failed")
                print("Error: \(task.error)")
            }
            if ((task.result) != nil){
                NSLog("Something happened")
            }
            return nil
        })
    }

If you get this error message:

session task failed with error: Error Domain=NSURLErrorDomain Code=-1200 “An SSL error has occurred and a secure connection to the server cannot be made.” UserInfo={_kCFStreamErrorCodeKey=-9824, NSLocalizedRecoverySuggestion=Would you like to connect to the server anyway?, NSUnderlyingError=0x7fbcb38103c0 {Error Domain=kCFErrorDomainCFNetwork Code=-1200 “(null)” UserInfo={_kCFStreamPropertySSLClientCertificateState=0, _kCFNetworkCFStreamSSLErrorOriginalValue=-9824, _kCFStreamErrorDomainKey=3, _kCFStreamErrorCodeKey=-9824}}, NSLocalizedDescription=An SSL error has occurred and a secure connection to the server cannot be made., NSErrorFailingURLKey=https://dynamodb.us-east-1.amazonaws.com/, NSErrorFailingURLStringKey=https://dynamodb.us-east-1.amazonaws.com/, _kCFStreamErrorDomainKey=3}

Add the following to info.plist:

 <key>NSAppTransportSecurity</key>
    <dict>
        <key>NSAllowsArbitraryLoads</key>
        <true/>
    </dict>

Adding this disables App transport security that was implemented in iOS9. See more info here.

AWS DynamoDB Swift – Query

To query items in a DynamoDB using swift.

(I will be using the example based here, translated to use swift). You can find the source files here: Github

Here is what my table looks like in aws:

dynaboDB-table-example

You first have to define a Mapping Class. Basically this is where you define what values from the table you need to get:


//class that gets the objects from db
class DDBTableRow :AWSDynamoDBObjectModel ,AWSDynamoDBModeling  {
    
    var ISBN:String?
    var Title:String?
    var Author:String?
    

    class func dynamoDBTableName() -> String! {
        return "Books"
    }

    
// if we define attribute it must be included when calling it in function testing...
    class func hashKeyAttribute() -> String! {
        return "ISBN"
    }


    class func ignoreAttributes() -> Array<AnyObject>! {
        return nil
    }
    
    //MARK: NSObjectProtocol hack
    //Fixes Does not conform to the NSObjectProtocol error

    override func isEqual(object: AnyObject?) -> Bool {
        return super.isEqual(object)
    }
    
    override func `self`() -> Self {
        return self
    }
}

Once you have the class implementation, then you can begin the querying. Here I created a function called getQuery the returns the values:


    func getQuery(){
        //performing a query
        
        //first create expression
        let queryExpression = AWSDynamoDBQueryExpression()
        
        //second define the index name
        queryExpression.indexName = "Author-index"
        
        //3rd hashes
        queryExpression.hashKeyAttribute = "Author"
        queryExpression.hashKeyValues = ("Jose Deras")
        
        
        //putting it all together
        let dynamoDBObjectMapper2 = AWSDynamoDBObjectMapper.defaultDynamoDBObjectMapper()
        
        
        dynamoDBObjectMapper2.query(DDBTableRow.self, expression: queryExpression) .continueWithExecutor(AWSExecutor.mainThreadExecutor(), withBlock: { (task:AWSTask!) -> AnyObject! in
            if (task.error == nil) {
                if (task.result != nil) {
                    NSLog("Somthing happened")
                    //starting the output of data
                    let tableRow = task.result as! AWSDynamoDBPaginatedOutput
                    for (items) in tableRow.items {
                        print("\(items.ISBN)")
                        print("\(items.Title)")
                        print("\(items.Author)")
                    }
                }
            }
            else {
                print("Error: \(task.error)")
                
            }
            return nil
        })
        
        
    }

If you get this error message:

session task failed with error: Error Domain=NSURLErrorDomain Code=-1200 “An SSL error has occurred and a secure connection to the server cannot be made.” UserInfo={_kCFStreamErrorCodeKey=-9824, NSLocalizedRecoverySuggestion=Would you like to connect to the server anyway?, NSUnderlyingError=0x7fbcb38103c0 {Error Domain=kCFErrorDomainCFNetwork Code=-1200 “(null)” UserInfo={_kCFStreamPropertySSLClientCertificateState=0, _kCFNetworkCFStreamSSLErrorOriginalValue=-9824, _kCFStreamErrorDomainKey=3, _kCFStreamErrorCodeKey=-9824}}, NSLocalizedDescription=An SSL error has occurred and a secure connection to the server cannot be made., NSErrorFailingURLKey=https://dynamodb.us-east-1.amazonaws.com/, NSErrorFailingURLStringKey=https://dynamodb.us-east-1.amazonaws.com/, _kCFStreamErrorDomainKey=3}

Add the following to info.plist:

 <key>NSAppTransportSecurity</key>
    <dict>
        <key>NSAllowsArbitraryLoads</key>
        <true/>
    </dict>

Adding this disables App transport security that was implemented in iOS9. See more info here.

PFQueryTableViewController Swift – load next page

I was having some issues using PFQueryTableViewController with Parse loading the next page using didselectrowatindexpath. The error was NSIndexOut of Range when selecting the load next page cell.

Here was the fix:


// Initialize the PFQueryTable tableview
    override init(style: UITableViewStyle, className: String?) {
        super.init(style: style, className: className)
    }
    
    
    required init(coder aDecoder: NSCoder) {
        super.init(coder: aDecoder)!
        parseClassName = "yourClass"
        pullToRefreshEnabled = true
        paginationEnabled = true
        objectsPerPage = 11
        
    }
    
        override func tableView(tableView: UITableView, cellForRowAtIndexPath indexPath: NSIndexPath, object: PFObject?) -> PFTableViewCell {


        let cellIdentifier = "statusCell"
        var cell = tableView.dequeueReusableCellWithIdentifier(cellIdentifier) as? statusCellClass
        if cell == nil {
            cell = statusCellClass(style: UITableViewCellStyle.Default, reuseIdentifier: cellIdentifier)
            }
        
        // Extract values from the PFObject to display in the table cell
        if let object = object {
          cell!.status.text = (object["status"] as! String)
        // Date for cell subtitle
            var dateFormatter = NSDateFormatter()
            dateFormatter.dateFormat = "yyyy-MM-dd"
                let dateForText = object.createdAt as NSDate!
                cell!.created.text = dateFormatter.stringFromDate(dateForText)
        }
        return cell!
    }


    override func tableView(tableView: UITableView, didSelectRowAtIndexPath indexPath: NSIndexPath){
        //if the index is out of range 11, [0-10] make that cell load next page
        if (indexPath.row == self.objects!.count){
            loadNextPage()
        }
        else{
            var targetObject = objectAtIndexPath(indexPath)!
            rowObjectID = targetObject.objectId as String!
            NSLog("Row Pressed")
            NSLog("%@", targetObject)
            NSLog("%@", rowObjectID)
            performSegueWithIdentifier("editStatus", sender: self)
        }
    }