Creating a new report template in Documentum

Once you have created a new report template you will then have to upload the new report. This is a continuation of my last post on how to modify an existing report.

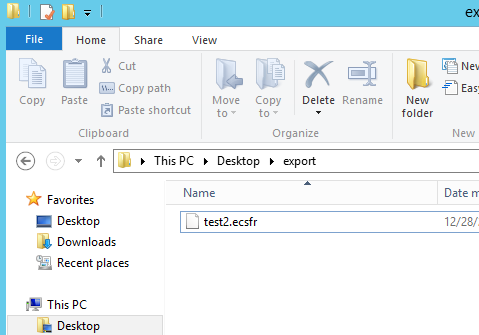
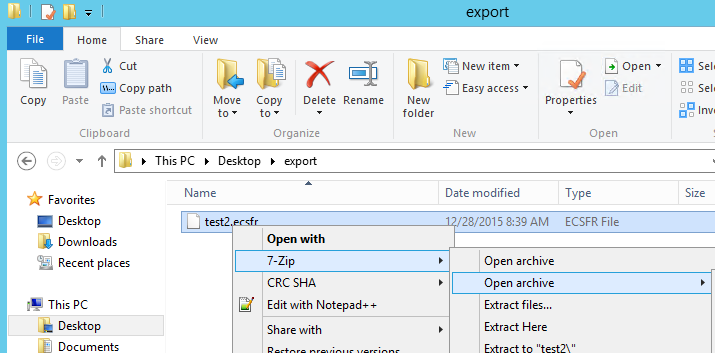
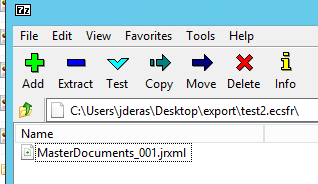
Once you have the new .ecsfr package:

  1. Log back into Documentum with an admin account
  2. Go to Project Admin > Project Configs > Reports > Templates
  3. Select File > import report template
  4. Select the new report .ecsfr file
    • The type should be ECS Report
    • Format: ECSF Report Package
  5. Once it is created then go to the types folder under reports
  6. In this example we modified the Master Document Reports. Right click the Report type and select properties
  7. Under templates select the edit link
  8. Search for the name of new report you just uploaded
  9. Add it to the list and select ok
  10. Now you report is ready to be created.
  11. Go to your reports folder in your cabinet.
  12. Select file > new report
  13. Create a new, and select the report type we just added the new report under
  14. The report template should show the new report you just uploaded. Select next and edit all the properties you wish to add
  15. Run report
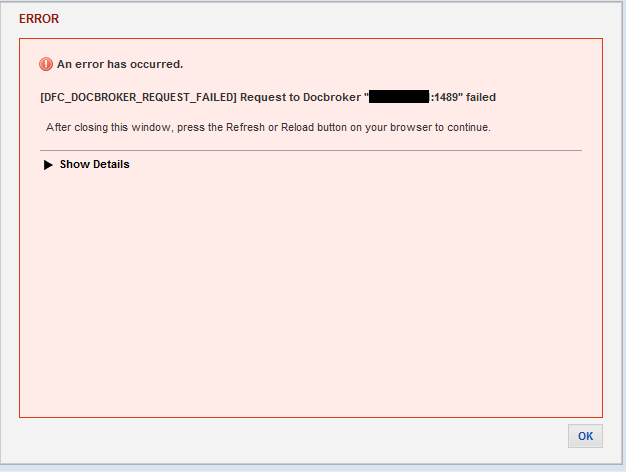
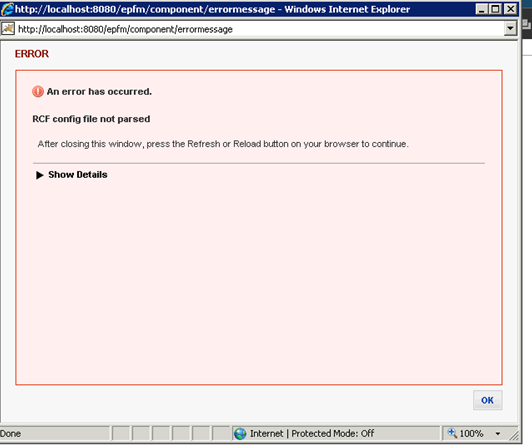
    • If you get an error when running the report there is an issue with the modifications you made to the report.
      • Check the source code of the report and make sure the query gives the values you are trying to output.
      • Make sure the layout is correct and the report doesnt use any values that are not available

Modifying Documentum – Reports

In this example I will be modifying the Master Documents Report. To modify a documentum report use the following steps:

  1. Login to documentum and go to reports
  2. Right click the Report you wish to modify and select export.
  3. Save the package
  4. You should see the filename.ecsfrecsfr export
  5. Using a file archiver unarchive – extract the package (I will be using 7-zip)ecsfr_open
  6. You’ll then see the a .jrxml file
  7. jrxml
  8. The jrxml file is a jasper report file. You will need to download and install Jaspersoft Studio http://community.jaspersoft.com/project/jaspersoft-studio to view and edit the file
  9. Once Jaspersoft Studio is installed then you can view and modify the the report
  10. With Jaspersoft studio you can change the layout and modify what can be displayed.
  11. There are 2 ways you can do this. If you are familiar with any reporting software you will notice jaspersoft is the same. You can modify the design and modify the source code
  12. Using the source code view you can see in details the query the reports run
  13. Once you are finished making the changes
  14. You will need to use 7-zip to archive the .jrxml file back to the .ecsfr format.
  15. Right click > 7-zip > add to archive > change the .zip to .ecsfr
  16. That’s it!
  17. To view how to upload the new report proceed to the next article

DFC_DOCBROKER_REQUEST_FAILED

When trying to access the web front end for Documentum you might get the following error.

[DFC_DOCBROKER_REQUEST_FAILED] Request to Docbroker “ContentServerName:1489” failed

DFC_DOCBROKER Error


Typically this means that the appserver has lost the connection with the content server. You can check the content server Log files to see the errors.

Solution:

  1. Check the all the services are running without any issues.
  2. Check that the content server logs for any errors.
  3. Restart both servers.

EPFM – Loading error – no content file can be found

When loading a document within Documentum EPFM you might come across the following error:

No Content File can be found using the path in the cell

Loading Error
EPFM-Document loading error

There can be a few errors occurring here…

The file is missing or path is incorrect:

  1. Check that the file you are trying to upload is in the correct location that the content cell is pointing to.

Documentum cannot connect to the file server where you have the files located at:

  1. Check that the application server can access the file server. (not sure what the file server is? See next option)
  2. Ensure you can access both ways.
  3. Ensure that you have the correct permissions when connecting to the server

I need to view or change the content location:

The content location is set in the RCF-schema file. It can be found in the <content_location> tags.

  1. Export and edit your RCF-Schema file. Search for the content_location tag.
  2. View/edit the server that is listed in the tag. (note that the path is case sensitive)
    1. If you edit the file make sure and set the lifecycle to Active
  3. Map the file server to your appserver.
    1. If you appserver is Linux make sure that once you mount the cifs share you are able to browse the directory.
  4. If you edited the RCF file be sure and re-read the rcf-configuration
    1. You can do this in EPFM > tools > Re-read RCF Configuration

xPlore Watchdog Service failed to ping

After a server reboot your searches might not work and/or you might receive an error:

xPlore Watchdog Service failed to ping application IndexAgent. Instance: XPLORE_9200_IndexAgent  Cause:http://XPLORE:9200/IndexAgent is not reachable. Connection refused: connect

  1. First check that the xplore index server is running.
  2. Make sure the services are running on the server:
    1. Documentum Indexagent
    2. Documentum xPlore PrimaryDsearch
    3. Documentum xPlore Watchdog -C xPlore
  3. Then make sure that the agent is running in DA
    1. Log into DA
    2. Expand Indexing Management
    3. Select Index Agents and Index Server
    4. Right click the index server and select start agent


Documentum EPFM – RCF config file not parsed

When trying to edit the RCF file in EPFM Documentum you might encounter the following error:

RCF config file not parsed

rcf config file error
RCF Config error

You will get this error if you try to edit and check out the RCF-schema config file using the system notepad.

In order to get all the correct values and avoid the parsing error first export the file and then make your modifications using a  Composer, or a source code editor like Notepad++.

Then you can upload the new RCF-schema file and demote the older RCF-schema config file.